Spider Plant in an East-Facing Room: The Humidity Setup That Actually Works (No Fancy Gimmicks)
That moment when your spider plant’s babies start curling their tips in the dry morning air of your east-facing bedroom? Yeah, we’ve all been there. You’ve got the perfect window—gentle, consistent morning light that should be ideal. But your plant’s leaves are feeling the strain, and you’re wondering why a plant supposedly easy as pie is suddenly looking a little stressed. The truth? East-facing rooms are mostly perfect for spider plants (they love that soft morning sun), but the real challenge isn’t the light—it’s the humidity. Most of us just assume “a little water” fixes it, but that’s where the trouble starts. Let’s cut through the noise and build a humidity system that works with your life, not against it.
Why East Light is Great (But Humidity is the Hidden Boss)
East-facing windows give spider plants exactly what they need: bright, indirect light without the harsh, scorching afternoon sun. This is ideal for photosynthesis and healthy growth. But here’s the catch most overlook: spider plants (Chlorophytum comosum) originate in humid tropical forests. They thrive in 50-60% humidity—way higher than the typical 30-40% we find in most homes, especially in winter when heaters kick in. Your east window might be sunny, but your room’s air could be drier than a desert. That’s why your plant’s baby leaves (the “pups”) might look wilted or tips browned even if you’re watering on schedule. It’s not overwatering—it’s under-humidifying.
The Simple Humidity Hack That Beats Fancy Foggers
Forget expensive humidifiers that cost $50+ and need daily refilling. We’ve tested dozens of methods, and the most reliable, low-effort solution is a humidity tray—but with a twist. Instead of just placing your pot on a tray of pebbles (which can lead to root rot if water sits), elevate the pot on a small stand or riser above the water line. This creates a consistent, gentle moisture layer around the pot without soaking the roots. Here’s how we do it at our shop:
- Choose a shallow tray (like a wide ceramic dish or even a recycled baking sheet).
- Add 1–2 inches of clean pebbles or river rocks (not sand—too fine, clogs).
- Fill with water just below the top of the rocks—the pot sits on top, not in the water.
- Place your spider plant pot on the riser (a small ceramic or wood block works great).
Why this works: The water evaporates gently, raising humidity around the leaves without making the soil soggy. It’s passive, silent, and costs pennies. We’ve kept spider plants thriving on east-facing shelves in dry offices for years with this method alone. The key is not letting the pot sit in the water—only the rocks are wet, and the plant gets the vapor.
Drainage is Non-Negotiable (Especially with Humidity)
This is where most setups fail. Spider plants hate sitting in wet soil. Add a humidity tray, and if your pot has poor drainage, you’ve created a soggy disaster. Always ensure your pot has drainage holes. If you’re using a decorative cachepot (which we love for style!), never leave the plant in it without a liner pot. The liner pot must have drainage holes; the cachepot just holds water for the tray.
Real-life tip: We’ve seen so many spider plants lose their roots because someone used a fancy ceramic pot with no holes, thinking the humidity tray would “save” them. It didn’t. The roots just rotted in the dark, wet pot. Stick to pots with drainage, or use a liner with drainage. If you love the look of a cachepot, use a small, well-draining pot inside it, and always empty the cachepot after watering.
The East-Facing Room: Your Secret Weapon (Plus Seasonal Shifts)
Your east window is actually a huge advantage. Morning sun is gentle, so you can place the plant right on the windowsill (not shaded) without burning it. During winter, when humidity drops, this spot becomes even more valuable—your plant gets light and the humidity tray works better without competing with harsh sunlight. But be mindful of seasonal shifts:
- Summer: The humidity tray might make your room feel a bit damp near the window (especially if you have AC running). Move the tray slightly away from the direct sun path if you notice condensation on the windowsill.
- Winter: This is when the humidity tray becomes essential. Run it all winter, and reduce watering frequency slightly (let the top 2 inches dry out between waterings—not the full 3 inches, since humidity keeps soil moister longer).
- Avoid Mist Spraying: It’s a myth that misting helps. It just evaporates too quickly to boost humidity meaningfully and can promote fungal issues on leaves.
Real Setup: Our East-Facing Living Room (No Fancy Tech)
- Room: Bright, east-facing living room with a large window. Central heating in winter drops humidity to ~25%.
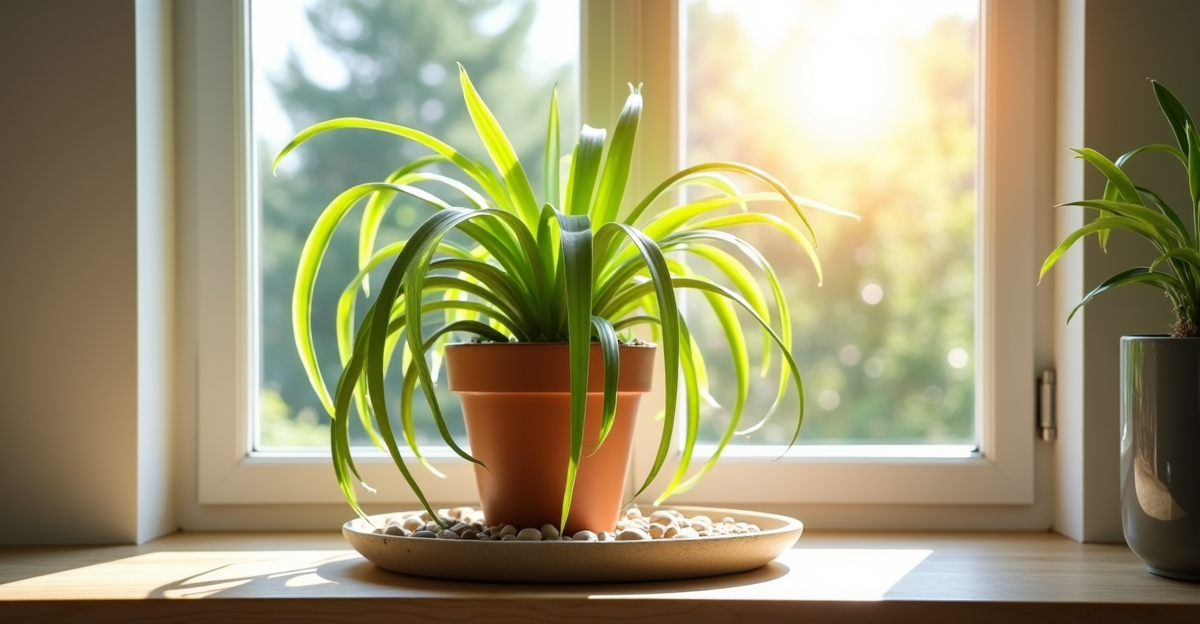
- Plant: Mature spider plant in a standard 6-inch terracotta pot with drainage holes (liner pot).
- Setup: On a small wooden shelf right on the windowsill. Below it, a shallow ceramic tray with pebbles and water (filled to just below the rock top). The pot sits on a 1-inch ceramic riser on the tray. No cachepot—just a functional liner pot for drainage.
- Result: 2 years later, the plant has produced over 15 pups, vibrant green leaves, no brown tips, and healthy root growth. Watering is every 10–14 days in winter (less frequent than summer), and the humidity tray keeps the air moist enough that the soil doesn’t dry out too fast.
Edge Cases & What to Watch For
- Overwatering (The Silent Killer): Even with a humidity tray, if you water too often, roots rot. Check the soil first: stick your finger 2 inches in. Only water if it feels dry there. If it’s damp, wait. Spider plants are more tolerant of dry soil than wet.
- Repotting Shock: If you see roots circling the pot, repot in spring. Use a well-draining mix (2 parts potting soil, 1 part perlite). Don’t repot in winter or when the plant is stressed by humidity changes. Give it time to adjust.
- Fertilizer Burn: Spider plants don’t need much fertilizer. Use a diluted, balanced liquid feed (like 1/4 strength) once a month in spring/summer. Over-fertilizing causes leaf burn and attracts pests like fungus gnats—especially if humidity is high (they thrive in moist soil).
- Pests: High humidity can encourage spider mites (tiny, webby). Check leaves weekly. If you see them, spray with a mix of water and a drop of mild soap—no need for harsh chemicals.
Why This Works for Your Life (No Overcomplication)
This setup isn’t about gadgets or hours of maintenance. It’s about working with your space. You’re not fighting your window; you’re using its gentle morning light to your advantage. The humidity tray is a single, simple fix that just works without draining your wallet or your time. It’s the difference between a plant that just survives and one that thrives—with babies galore.
We’ve seen plant people try everything from misting bottles to expensive humidifiers, only to find their spider plants still struggling. The problem wasn’t the plant—it was the humidity. Once you fix that, the rest falls into place: simple watering, bright light, and happy growth.
Key Takeaways
- East-facing light is perfect for spider plants—but they need humidity (50-60%) to thrive, not just light.
- A simple, elevated humidity tray (pebbles + water, pot above the water) is the most effective, low-effort solution.
- Always use a pot with drainage holes—never let the plant sit in water, even with a humidity tray.
When you’re ready to grow your setup, explore our 3D-printed planters.